
I went on the Fused Glass workshop yesterday. Glass by Design have worked hard to create a safe working environment in which to conduct workshops, which can often be a primary source of income for craft shops.
I was really pleased to see the news because Cathy and Angelina are lovely people and great tutors.
When I arrived, Cathy read my temperature, which came out as Low. Had it shown a high reading, I wouldn’t have been allowed in and would have to reschedule. I even took my temperature before I left in the morning, just to make sure 🙂
Inside the shop, they have converted the stained glass workshop communal table space to individual booths with Perspex windows so you can see the tutor demonstrating in the middle.
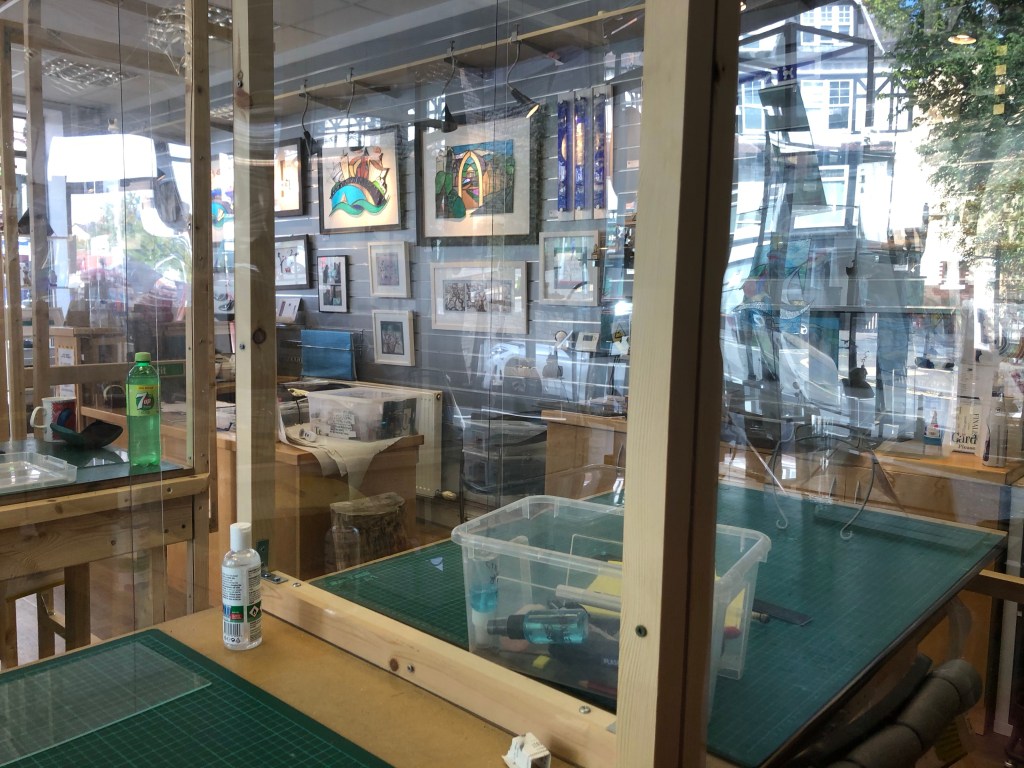
The above picture is from inside my booth. You can see some of the tutors work along the back, all for sale.
Inside the booth I had a face visor and hand sanitiser gel, plus a box of tools for me to use and my own supply of glass stringers and frits. Stringer’s are long thin strings of glass in varying widths to about 2mm. And frits are small, tumbled, pieces of broken glass. There was also a piece of picture framing 2mm glass for us to practice cutting glass.
After practicing cutting glass, we moved on to planning what we wanted to create. The previous night I had scoured my pictures from the past 2 years to try and find something I would want to do. I settled on a bluebell photo I had seen online, and with advice from Cathy, we thought it would be simple enough to work.

The piece is 20x15cm in size and this helped me think about the frit and glass that I would need to recreate the image.
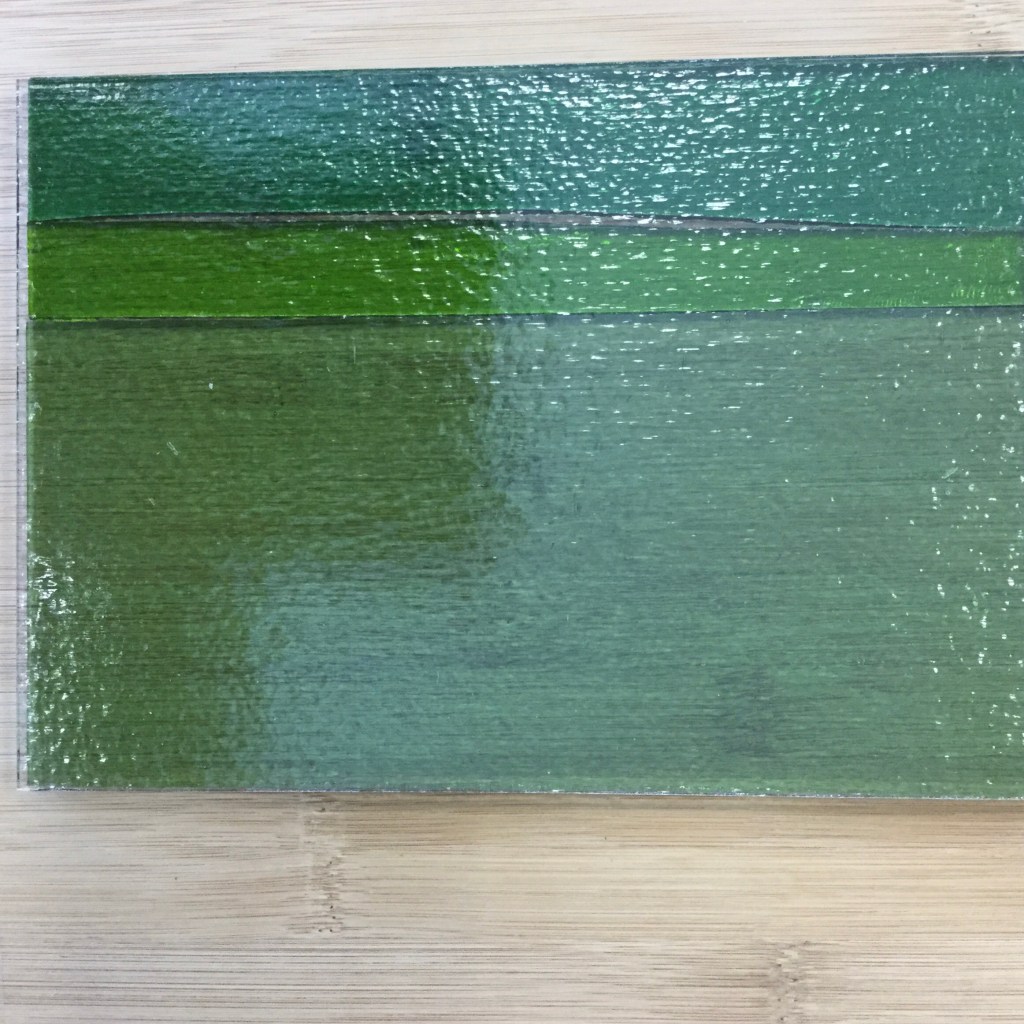
The first part of cutting is to create the backdrop that sits behind the clear glass that we work on. The greens and the clear are 3mm thick. If you recall from my first post, I mentioned that glass has a tendency to form to 6mm thick when heated in a kiln. Therefore, the two layers of 3mm glass will reform into a rectangle of 6mm but with straight sides. If it were thinner or thicker, the sides would either concave or convex to maintain a 6mm thickness across the glass.
After this section, I added the big structure pieces of tree trunks.
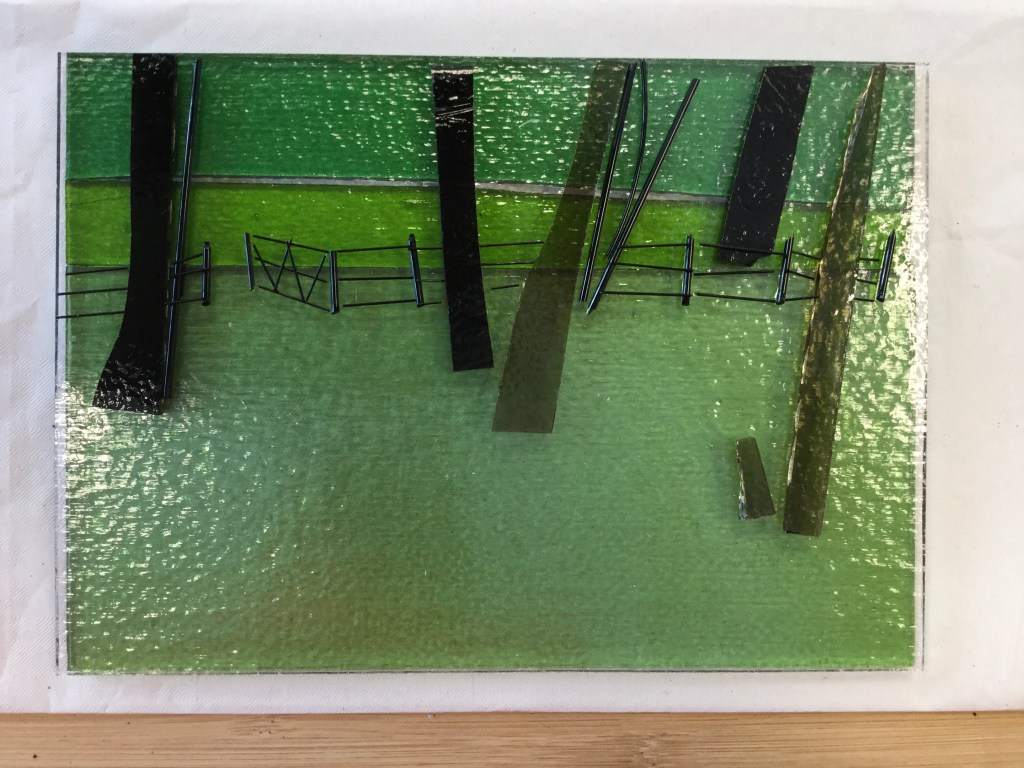
Here, you can see I also have added the fence and gate using mixed widths of stringers in black.

Then adding the detail with the frits of different colours. It’s strange because I quite like it like this, but I know it’s going to all fuse, so it might look quite different at the end of the process. But, that is part of the experience and learning, because you don’t always know how the kiln/heat will change things.
This is a full fuse, so the glass will be smooth in the end. A tack fuse is where you still have a textured surface, but the glass is bonded to the background glass.
The plan is this piece will go back into the kiln on a lower heat to slump it over a curved form, so that it will stand up. I might ask them if it may look better flat and placed in a stand or maybe a frame.
Annoyingly, When I got home and was looking back at the picture, I spotted a single blue frit higher on a tree trunk. I’ve asked if they could remove it for me.
So, there it is for now. I have a week or so to wait until I go to collect it.
I hope you have a good week planned.


How do you make sure the frits stay in place before the whole lot goes in the kiln?
LikeLiked by 1 person
There is a slow curing glue with which you apply drops around the edge and it spreads through. In the kiln high temperatures it gets burned away.
LikeLiked by 1 person
That is beautiful!! I love hearing how businesses adapt. It’s great to see people support them too:)
LikeLiked by 1 person
Thanks. Very true.
LikeLiked by 1 person
This is a creative medium! I had no idea.
LikeLiked by 1 person
It is and very flexible to be as abstract or detailed as you want. When I was looking around the web I came across these which take it to a whole different dimension. His work is amazing and with such depth. http://www.jdavidnorton.com/photographs
LikeLiked by 1 person
Thanks for the link.
LikeLiked by 1 person
Love it! And will love it again when it’s fused.
Someone somewhere is making a fortune from selling expensive Perspex! Better safe though and they’ve made a great working space.
LikeLiked by 1 person
Thanks Amanda. Hopefully going to see it tomorrow to make a decision on making it curved or keeping flat and mounting on a stand. At the moment, I am favouring the latter. But we shall see.
LikeLiked by 1 person
Fascinating! I love your piece already and look forward to seeing how it looks after the kiln. I suppose, in that way, it’s a bit like pottery in that the heat can transform a piece to look very different from how it went in.
LikeLiked by 1 person
Thank you. You are right. I’ve had a sneak peak at it already and found that what I thought were the same piece of glass, actually turned out very different in the kiln. I’ll have an update next week when I have proper pictures. 🙂
LikeLiked by 1 person
Great. How can somebody learn this art without any mess up? I really need a lot of skills.
LikeLike
I would recommend checking out CraftCourses.com as they have a huge list of craft workshops across the UK.
LikeLike