
Things were going so well. Until they didn’t. The title of this post should carry on as a Dismay, Resignation, Reorder and Start Again. I am sure we all have had these moments in our makes. (Please day I am not the only one!)
I traced the template and cut the pieces for the sneakers.

I moved on to cutting out and was happy with the result.


I commenced with the left shoe and got it finished, although at the time, I thought that this was tight with some of the stitching.
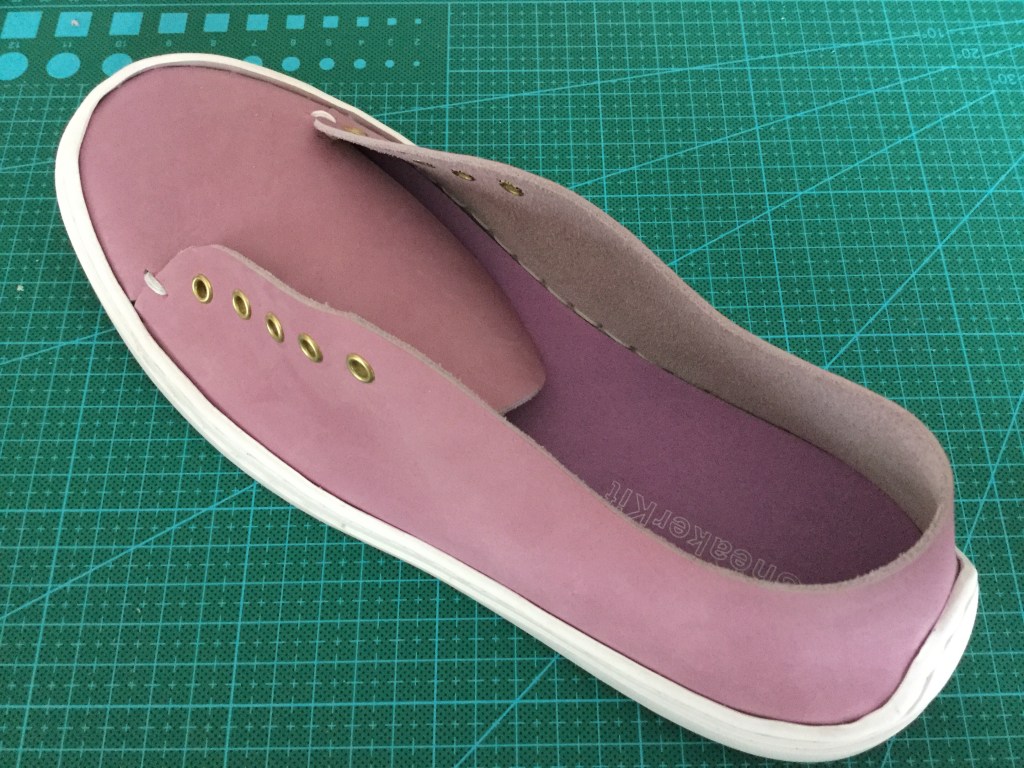
You can’t see it well in this one, but where the tongue front piece meets the front wings of the back (see the little white stitches in front of the eyelets) there are tiny triangular holes near the top of the sole.
I checked the video and I thought I could just about see some there too, so I thought, maybe this is ok and how it goes together. They had changed the pattern so there was no overlap anymore to make a better fit.
But this morning, and working on the next one, I wasn’t happy.
For a start, I must have marked a hole in the wrong place as I could see a single stitch higher than it should be. So, I unpicked the sneaker and cut a second tongue for the right shoe. This worked, but I had much larger holes at the join of front to back. Clearly this was not right. It’s one of those moments that you doubt and question lots of things.
I knew I had selected the right shoe template, and cut it out 99% perfectly. I decided to print out another and modify the tongue.
Once printed I marked up and cut out a new template and just to check my changes, I held it against one of the previous tongues.

OMG! Noooo! FFS! And many other curse words. At one point, I really felt like crying 😭. They were a different size. How could this be? This explains the tightness of the left sneaker in the making, and the little holes.
Well, I asked my Mum to print this first template because my ink had run out and it only arrived yesterday. I didn’t think to check it had printed correctly. But clearly, it hadn’t printed to 100% of the size for A4 paper. Measuring the new template against the first one, the back piece is about 1cm shorter and 7mm lower than it should be!
So, the only thing to do is order another piece of leather and start again.
If I have inspired you to make some sneakers (I hope I have not deterred you), always measure the 10cm gauge they add to the template. If it is not 10cm, then your template has not printed correctly and you will need to adjust the scale of the print.
And, not all printers print equally!
Roll on the replacement leather arriving. In the meantime, I have some leather to remove from some soles.
I guess you may be thinking it is a costly mistake. And you are right that it is unexpected cost. However, I can still make use of the leather I have, so watch out for what I come up with. All will not be wasted 🙂


I will be interested to see what you end up doing with the spoiled leather. Belt? Slippers? zip pouch?
LikeLiked by 1 person
Nothing as grands as belts and slippers. It will have to be small things to fit within the cut leather scraps. Scouring the internet for ideas at the moment 🙂
LikeLike
Oops! I make a lot of clothing using PDF patterns so I know it’s very important to print out at the correct scale – usually 100%. The first page generally has a 1 inch square to check before printing out the following pages and I always do that as some dressmaking patterns take loads of pages and that would be a complete waste of paper.
Very disappointing for you but I’m sure you’ll come up with an idea for the surplus leather piece.
LikeLiked by 1 person
True. I almost reprinted them when the ink arrived, but would have been too late anyway. Live and learn.
LikeLike
What a nightmare! I’ve had the problem in the past when printing American and patterns because of their non A paper sizes.
LikeLiked by 1 person
Keeps us on our toes. Won’t be a mistake I’ll be making again!
LikeLiked by 1 person