Wow, yesterday was great, if a little tiring from all the concentration. There were only two on the day-course, me and another. Then one person came for the morning and another came for the afternoon.
The location is not far from me by car and easily found. Glass by Design is the name, run by two lovely ladies. One teaching fused glass and the other stained glass. The sessions are run in the back of the shop where they create their artwork, or in the shop area itself.
In the morning it was the fused glass session which we did in the back where all the various pieces of glass are stored. I made a wide piece about 10cm wide by 20cm. The method used is called tack fusing. This where the glass is fired until it fuses to the glass base but retains its basic shapes. So it will have some texture to the surface. The piece I made will then also be slump fired over a shape to make it curved. That way it will stand up without support.
I then went on to create a coaster. This I had to do in about 10 minutes before lunch. The coaster will be full fused. This means the glass goes molton and what we added to the base will become one and we will have a smooth finish.
It is fascinating to know that glass has rules it abides to in the melting process. The coaster needs to be 6mm thick to retain its square shape. If it is less than 6mm, it will have concave sides as the molten glass will contract to be 6mm thickness. If it is more than 6mm, then when molten the sides expand so it becomes 6mm thick.
I love to find out things like this. It just makes this natural world we live in even more amazing, yet worrying that we seem intent as a race of people to destroy it for future generations.
I will collect my fused artwork next weekend I hope and will share pictures of it then.
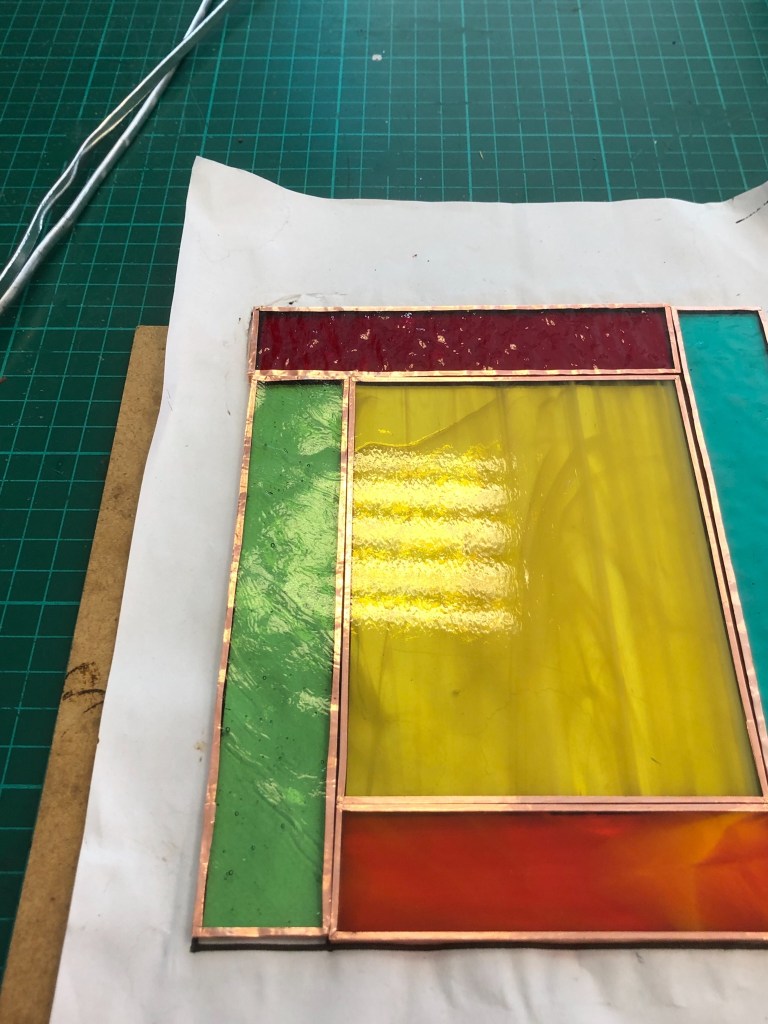
In the afternoon it was the stained glass technique. We were told about the basics and safety requirements with this method. As you can imagine, we all handled the glass carefully given it was all cut pieces with sharp edges, plus working with chemicals and a hot soldering iron.
We selected our desired pieces of coloured glass and laid them out on the diagram. Then it was on to putting it altogether and soldering. There are a couple of steps involved.
- Edge each piece in a sticky backed copper foil. This is the method invented by Tiffany.
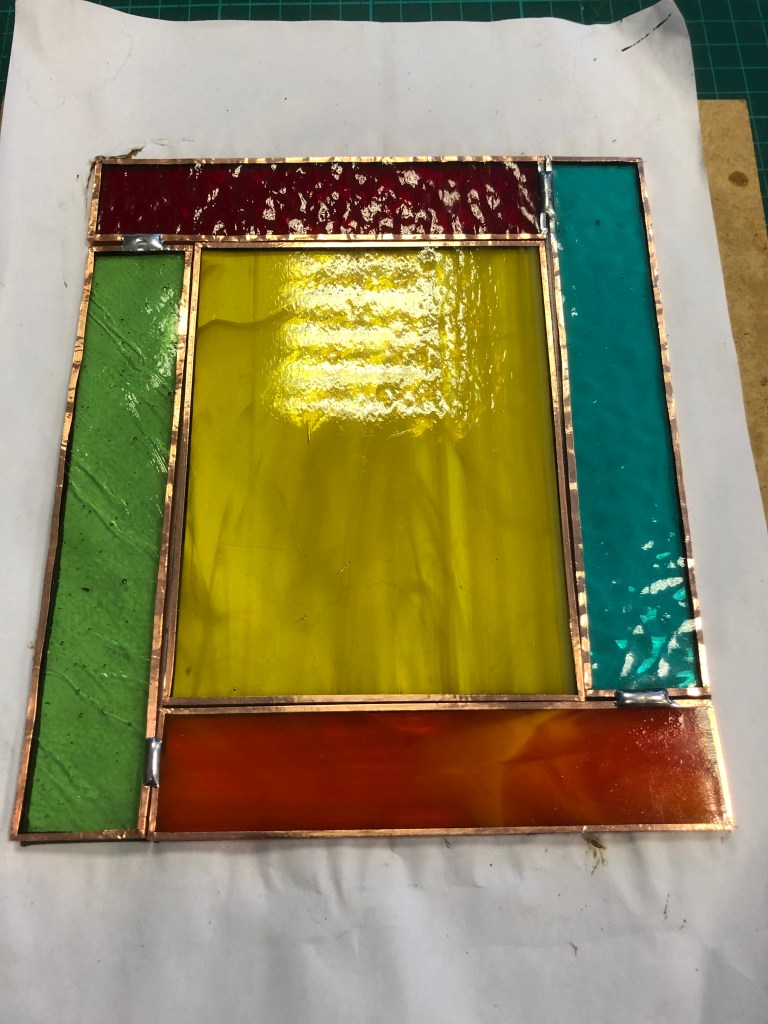
- Flux and solder the outer pieces in four spots to fix them.
- Turn over and flux and solder all joins and the edge of copper.
- Turn back over and fully solder the joins on the front and copper edges.
- Then return to the back to tidy up with more solder.
- We then had to sold the side of the copper so it was all covered.
- Finally, we soldered to hanging rings to the edges.
- The last step was to wash the glass and then paint on a compound that turns the tin solder black/dark grey. And you are done after washing it again.
Thankfully no one burnt or cut themselves and we were all pleased with our finished product.
Here are some pictures of the various steps.

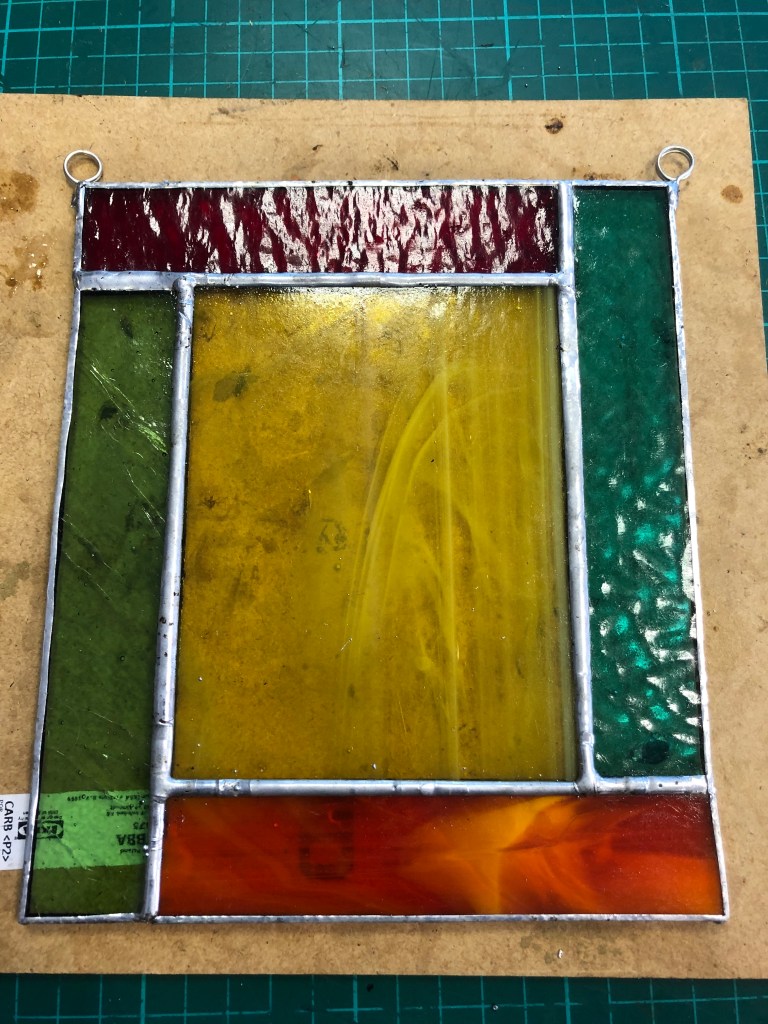

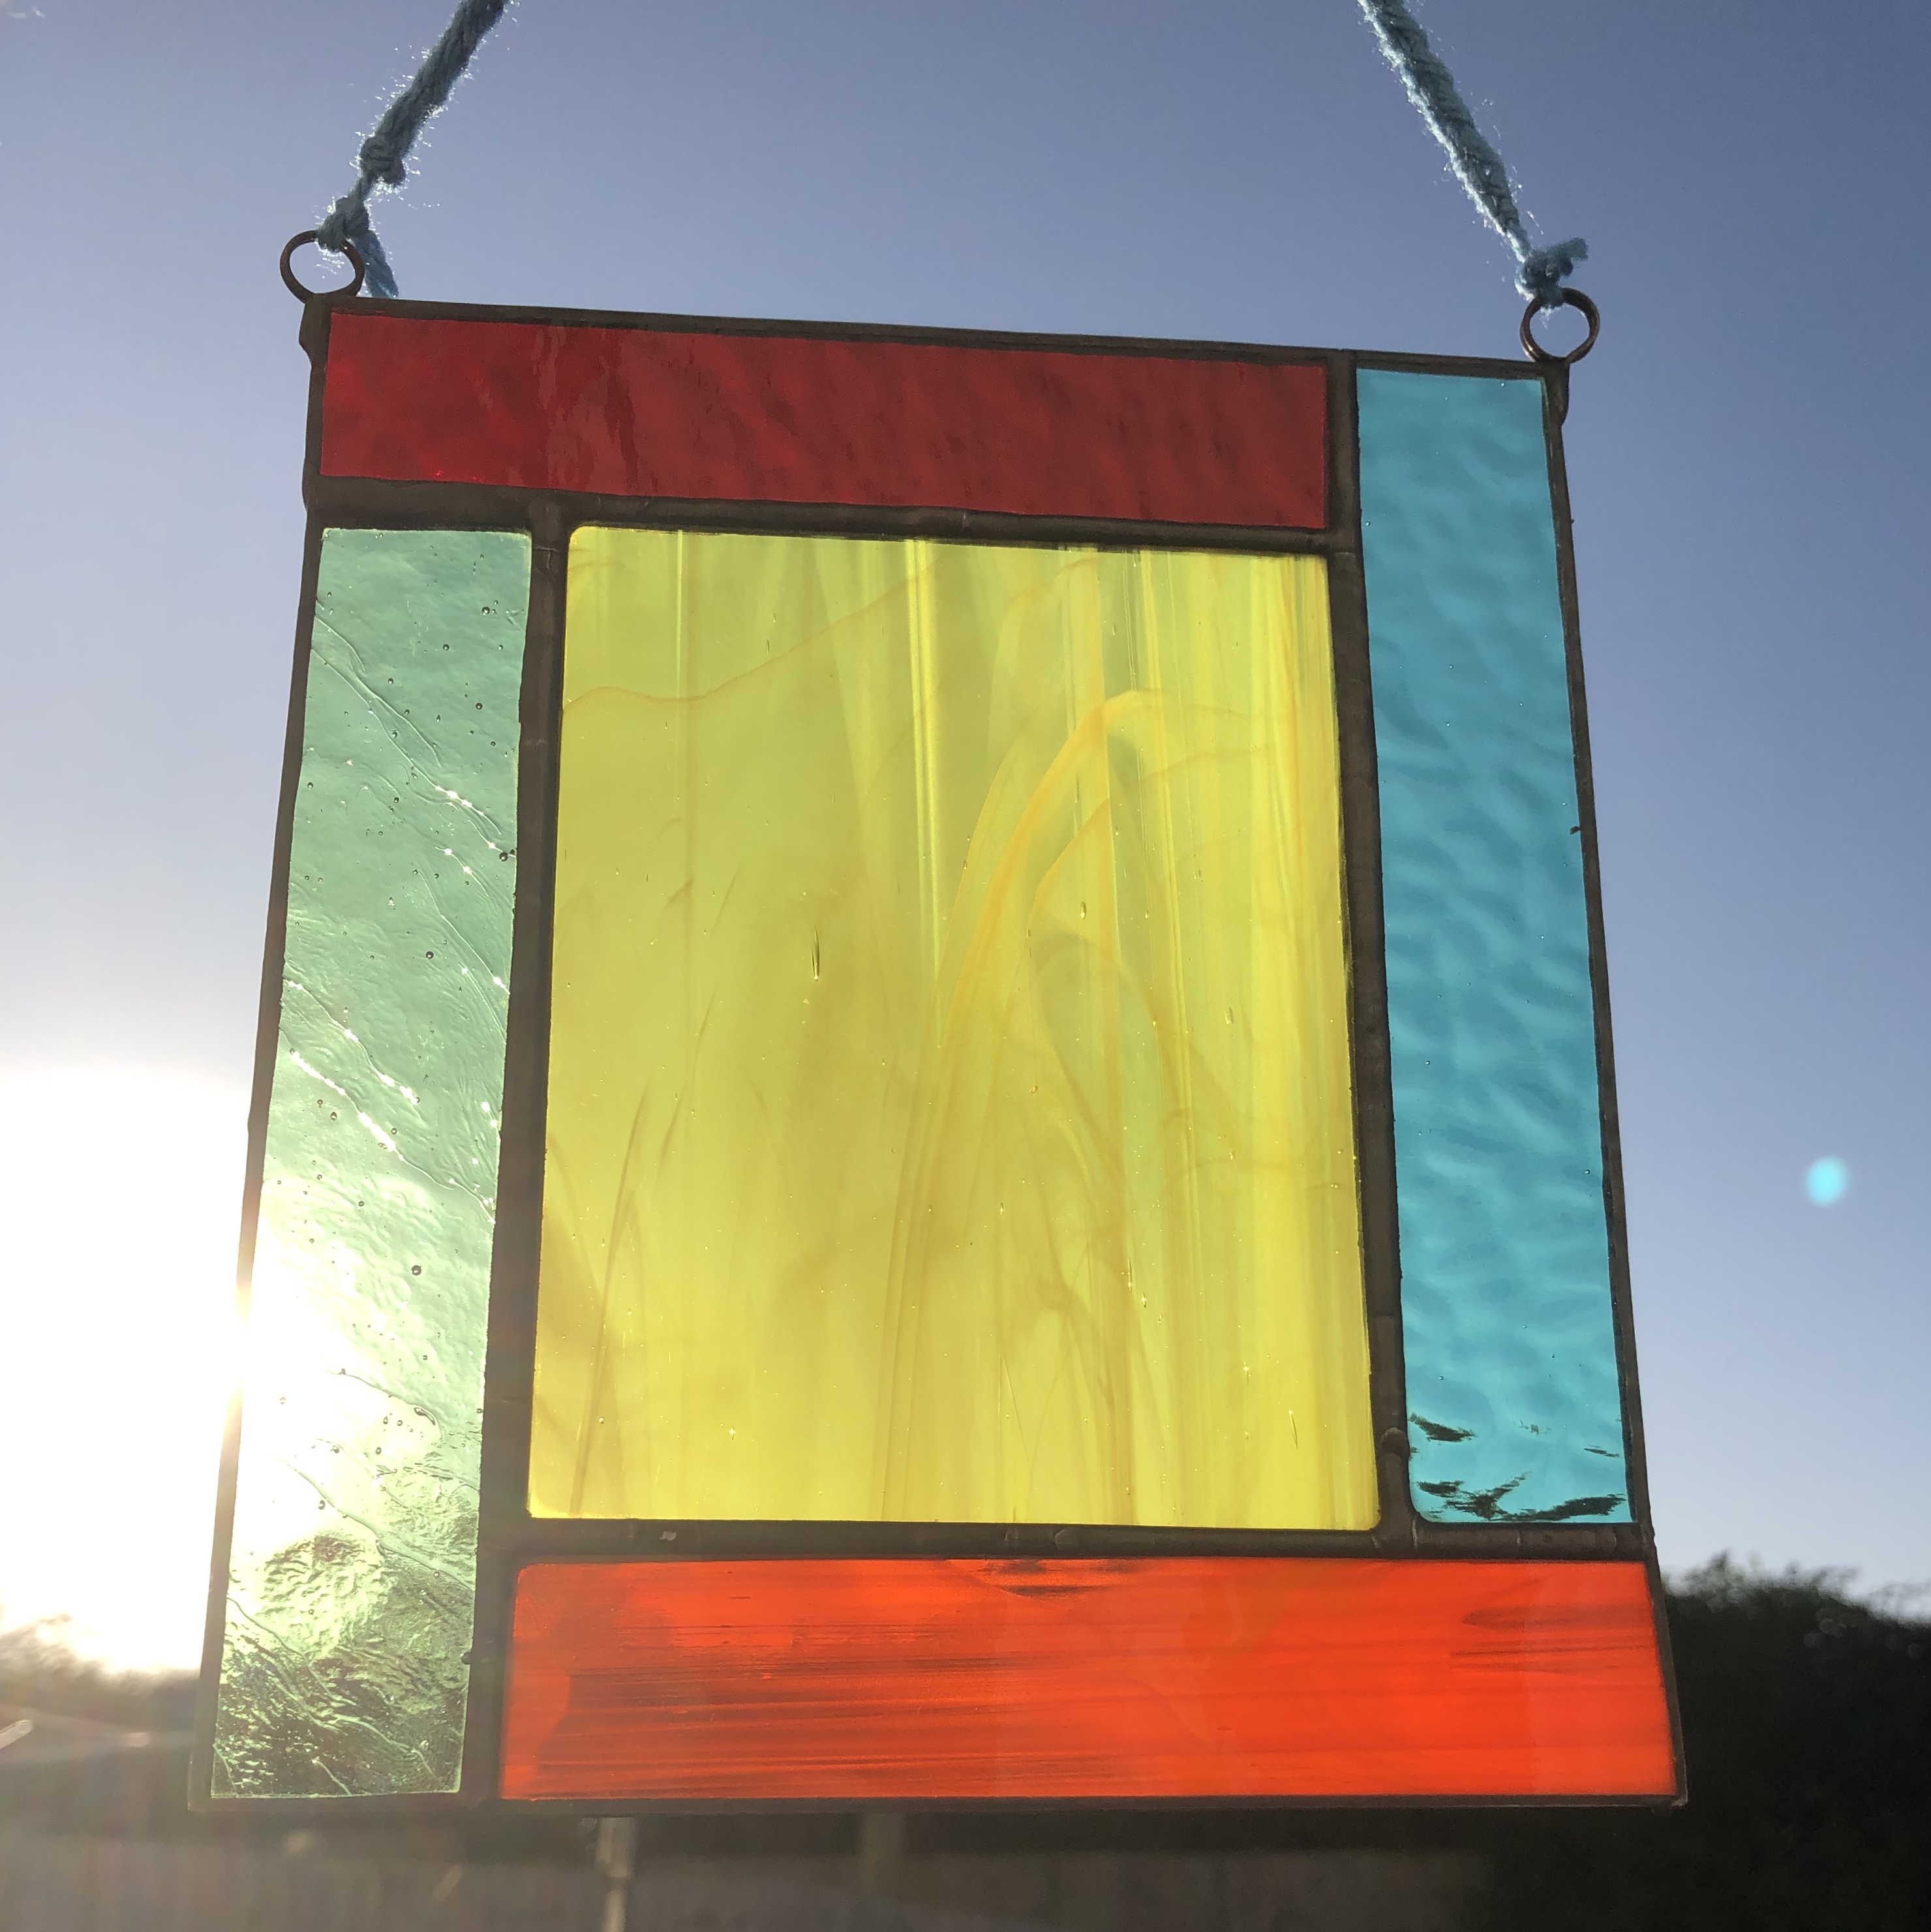
I am pleased with the result. I might have selected a different colour on one side just to give more contrast to the opposite. But it does what it should.
This was a taster day and cost £110. To have three pieces of art and a full day tutorial and lunch, I think that’s a good deal.
Hope you have all been busy too.


I’m impressed!
LikeLiked by 1 person
Thanks Kate. I may go on a full day in the new year and actually cut/design my own.
LikeLiked by 1 person
What a cool class
LikeLiked by 1 person
It was. Already looked at costs for equipment, but I am restraining myself.
LikeLiked by 1 person
I am going to look into classes because yours sounds so interesting.
LikeLiked by 1 person
You should. It’s one of those fairly instant (stained glass) crafts that you can walk out with something you created. We need things like that sometimes when we might take days or weeks to finish something big with yarn.
LikeLiked by 1 person
Fantastic! I’m looking forward to seeing the other pieces you made. It all sounds fascinating.
LikeLiked by 1 person
I am a little nervous and keeping fingers crossed for the next two pieces during kiln firing.
LikeLiked by 1 person